We recently moved our old blog posts from a different system (Jekyll) to WordPress. We used RSS to move the content over, and figured there might be others looking to do the same. This guide will show you how to migrate a blog to WordPress using RSS. Let’s jump in.
What you’ll need
- An RSS file containing all your blog posts
- The WP All Import WordPress plugin
Typically public-facing RSS feeds contain the latest 10 or so items, and many contain only excerpts of the content. To move all your posts in full, you’ll want to generate an RSS file that contains all your items with the full post content.
No suitable RSS file?
If you can’t generate an RSS file with all your blog posts in full, you might find our Full-Text RSS and Feed Creator tools useful in producing such a feed. We also offer paid support in producing feeds like this if you’d rather not have to do it yourself.
Let’s start with the basic steps you need to follow using a standard RSS file. Ready to start?
Turn an RSS file into WordPress blog posts
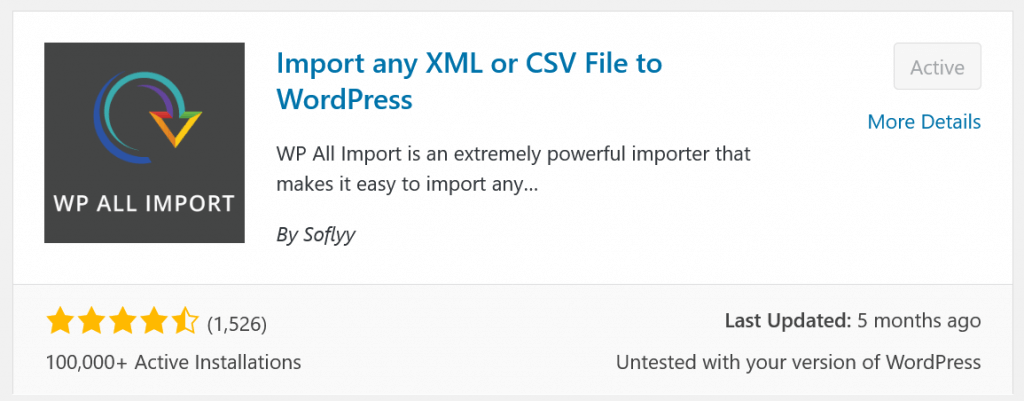
We’ll be using the WP All Import plugin by Soflyy in this guide. It allows you to upload an RSS file and have each item in the file produce a new WordPress blog post. It produced very good results for us.
Moving from WordPress to WordPress?
In the screenshots that follow you’ll see we’re importing a WordPress RSS file for demo purposes, but if you’re actually moving an existing WordPress site to another WordPress instance, there are better and easier solutions available, such as All-in-One WP Migration.
Step 1: Install WP All Import
Log into WordPress and install the WP All Import plugin. If you’re searching for this plugin, the name will show up as “Import any XML or CSV File to WordPress” in the WordPress plugins listing.
After installing, make sure you activate the plugin too.
We are using the free version of the plugin for this guide. There’s also a paid version which offers features like image importing. We won’t be importing images in this guide.
Step 2: Upload RSS file
After activation you’ll see “All Import” in your left admin menu in WordPress. Click on it to load the import page.
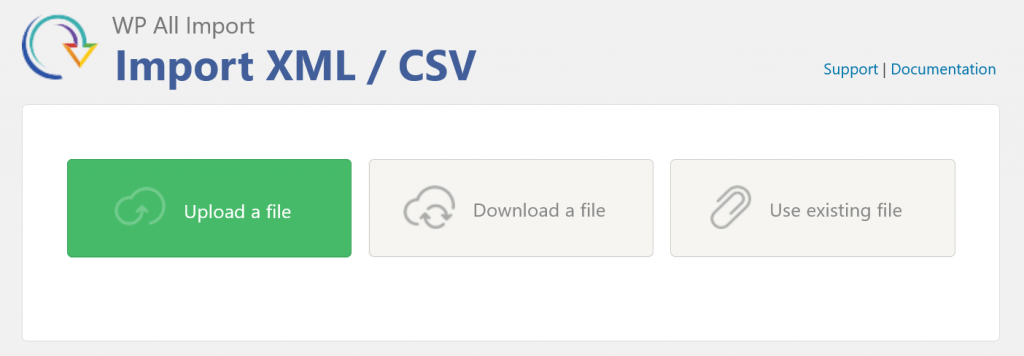
Now click “Upload a file” and select the RSS file you want to import.
Make sure the file has a .xml extension
If your file ends in .rss or some other extension, rename it so the extension is .xml (RSS is an XML-based format). Otherwise you’ll see a message saying “Uploaded file must be XML, CSV, ZIP, GZIP, GZ, JSON, SQL, TXT, DAT or PSV.”
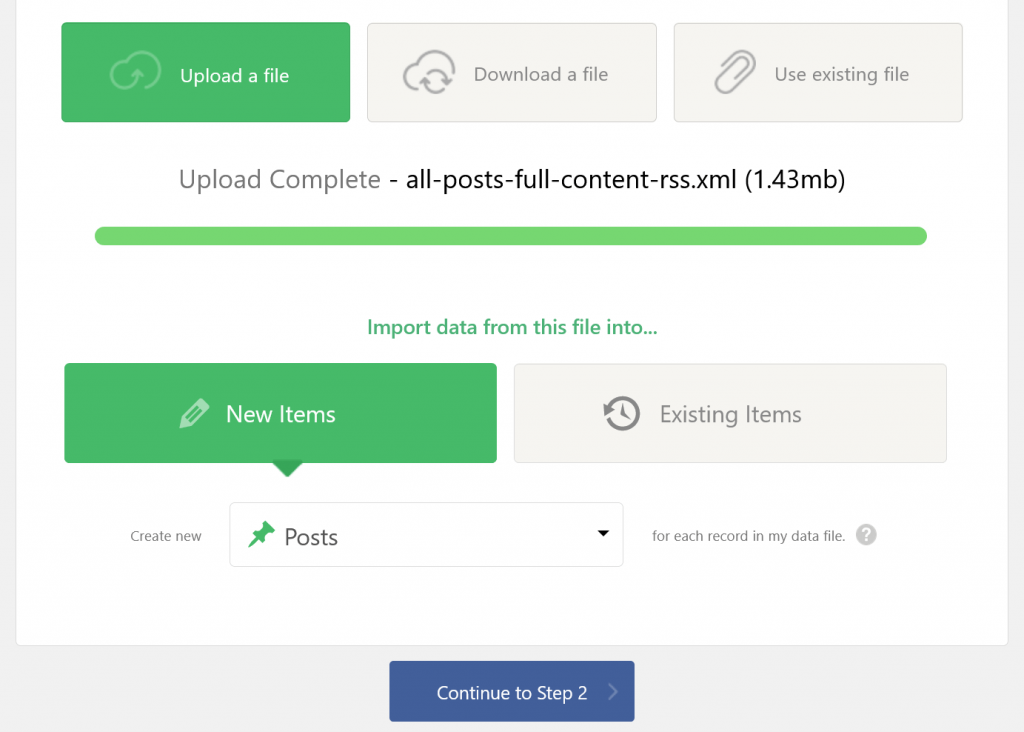
We’re importing blog posts into WordPress, so we want to keep the defaults here. Click “Continue”.
Step 3: Select item as blog post source
You’ll now see a list of elements from your RSS file. Each blog post will be contained in a <item> element, so if ‘item’ isn’t selected by default, make sure you select it.
Importing an Atom file?
Some systems produce Atom instead of RSS. They are similar in many ways, but use different element names. If you’re importing an Atom file you will see ‘entry’ instead of ‘item’. The following screenshots all show elements from an RSS file, so you’ll have to find their Atom counterparts to follow along.
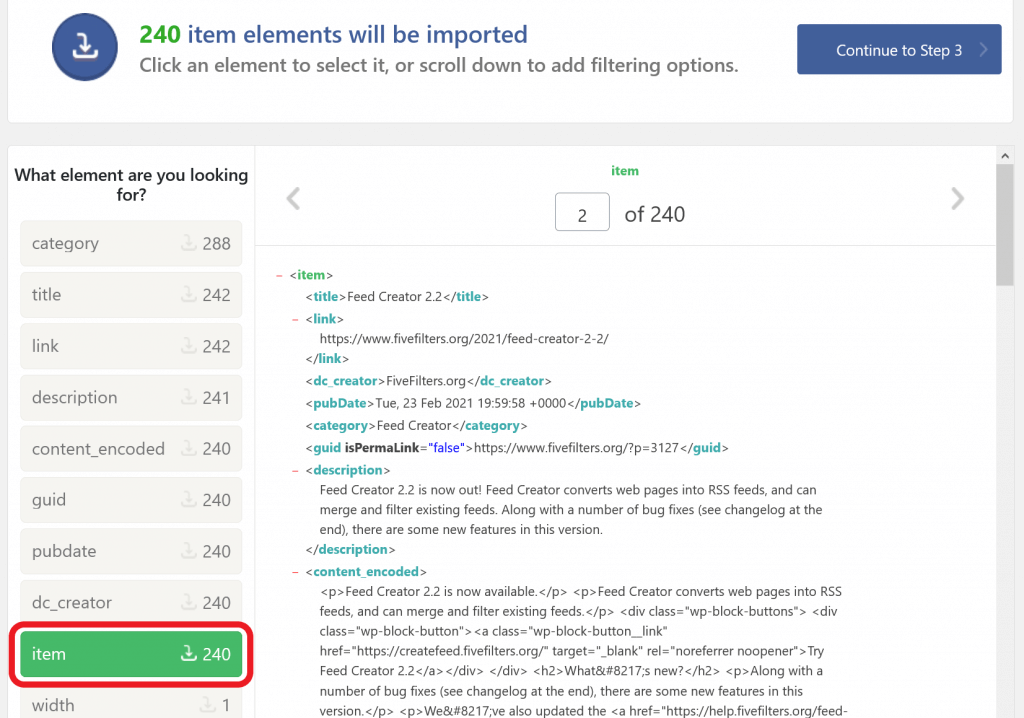
Click “Continue”.
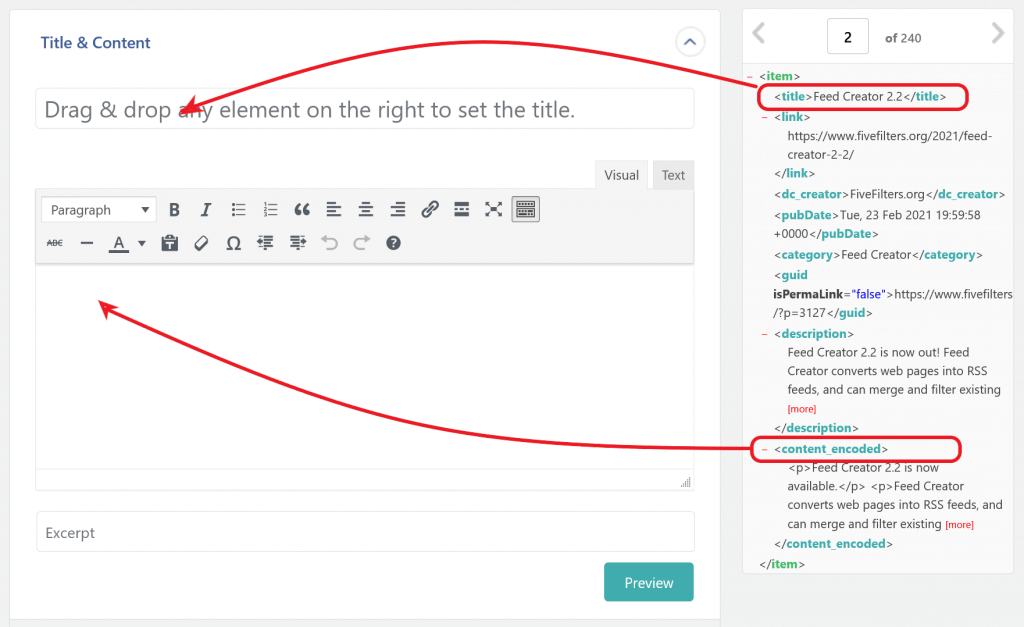
Step 4: Drag and drop post title and content
You’ll now see a column showing you fields for the title and content and a second column with one of your blog posts from the RSS file showing as XML elements.
You can navigate through your blog posts using the left and right arrow buttons to examine the contents, but the important thing here is deciding which sub-elements within item should be used when creating the WordPress posts.
You only need to copy an element from the right into a field on the left once. But if some of your items have sub-elements that you’d like to import that are missing from other items (e.g. maybe an author element or a category element), navigate to an item that contains those sub-elements, so you can drag them over.
RSS files with full article content usually have a <content:encoded> element (displayed as <content_encoded> by WP All Import). Some will contain the full contents in the <description> element.
Drag the <title> element from the right-column into the title field on the left. Do the same for the post content.
You should now see {title[1]} and {content_encoded[1]} in those fields. Click “Preview” to check that the content displays correctly.
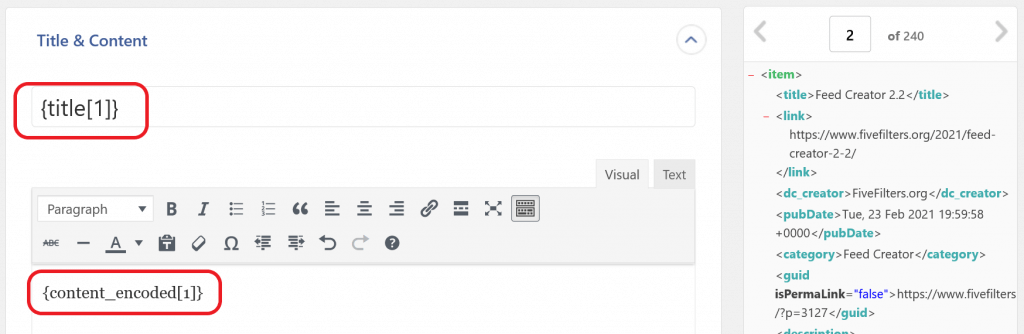
The number 1 in {title[1]} and {content_encoded[1]} refers to the first element of that type within each RSS <item>, not the item number in the RSS file.
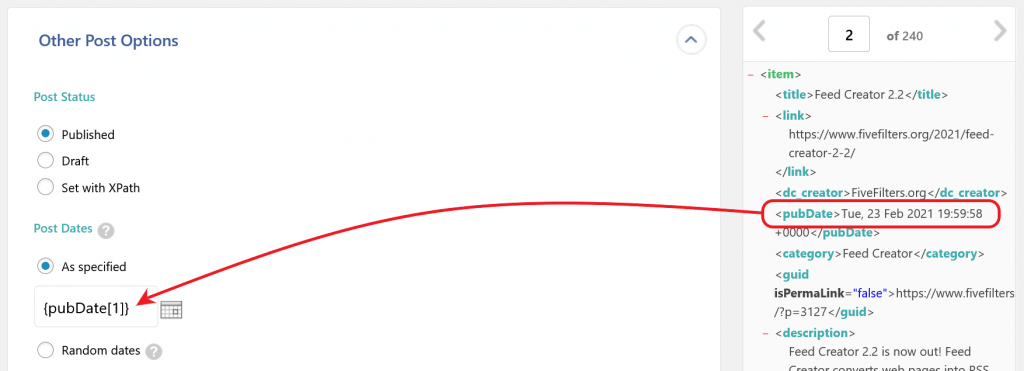
Step 5: Drag and drop post date
Now scroll down to the “Other post options” section and click the heading to expand it. Here you can copy over the post date in the same way. Make sure you delete the ‘now’ in the date field first.
If the site you’re importing into is already established and has visitors, you may want to review the results without having them exposed to visitors. If so, it’s a good idea to set the Post Status to “Draft” here. We also recommend limiting the number of posts on the first import (step 7).
Now click “Continue”.
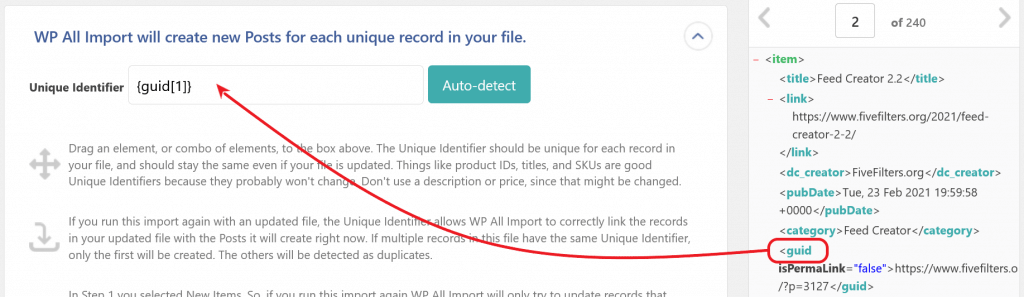
Step 6: Set a unique identifier
To help WP All Import avoid importing duplicates, and to allow it to update existing posts via another import, it needs you to specify one or more elements to use as a unique identifier for each imported item.
If your RSS file contains <guid> elements, they’re a good candidate to use here. Don’t worry if the guids are URLs from the site you’re moving away from – they will only be used internally by WP All Import.
You can also click “Auto-detect” to have WP All Import detect one or more elements to use as the identifier.
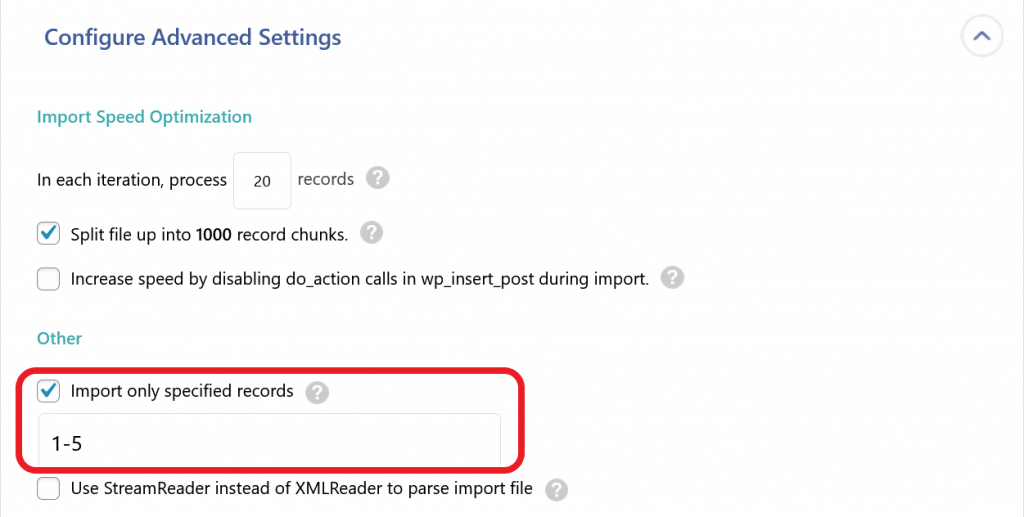
Before moving on from this step, we recommend expanding the “Configure Advanced Settings” section to limit the number of posts to import.
Step 7: Limit number of posts to import
We recommend limiting the initial import to a few posts to make sure the results look okay in WordPress. This is especially useful if you have a lot of posts to import. You don’t want to wait for everything to be imported to then find a problem you overlooked.
If the first import attempt looks good, you can go through the steps again and import everything.
Find the “Import only specified records” checkbox and enable it. In the field below, enter 1-5 to import the first 5 items in your RSS file.
Click “Continue”.
Step 8: Import!
You’ll now see a message saying “Your file is all set up!” with a summary of the import operation WP All Import will perform below it.

For our demo file it lists the following in the summary:
- WP All Import will process all 240 <item> records in your file
- WP All Import will process only specified records: 1-5
- Your unique key is {guid[1]}
- Piece By Piece Processing enabled. 20 records will be processed each iteration. If it takes longer than your server’s max_execution_time to process 20 records, your import will fail.
If the summary looks good to you, go ahead and click “Confirm & Run Import”.
Done!
You should now see a message saying “Import Complete!” and the number of records created. Click into your Posts page in WordPress and you’ll see the posts listed there.
Moving from Jekyll to WordPress?
If you’re going to be moving your blog from Jekyll to WordPress, as we did, our next post covers that in more detail. It will show you how to generate an RSS file with all your posts and how to set up redirects to make sure your old post URLs reach the same content on your new WordPress site.
Read: How to migrate a Jekyll blog to WordPress
Discuss
Please share any feedback on our forum.